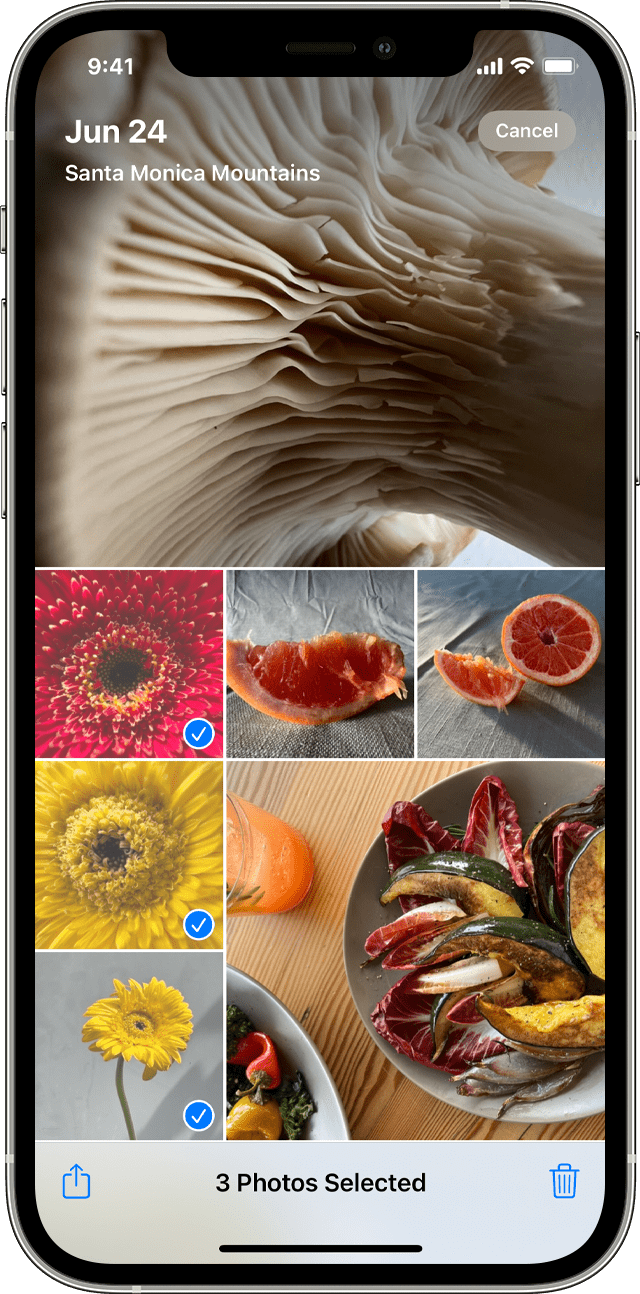
The most simple guide to delete photos from iPhone SE is to
- Open the Photos App
- Choosing the images you want to delete
- Tap on the ‘trash can’ icon and delete it
It’s just as easy as that. All you have to do is properly check the photos you want to get rid of. Tap on them and then delete them when necessary. But don’t worry it is also possible to transfer images and videos to the computer if you want to back it up. To know more about this and cloud storage, let’s get started.
The Easiest Step on How to Delete Photos from iPhone SE
The easiest step to delete photos from iPhone SE is basically opening the photos app, selecting the images you want to delete and then pressing the delete button.
Here’s how you can easily delete photos from your iPhone SE
Step 1: Start by opening the Photos app on your iPhone SE.
Step 2: Choose the photos you want to get rid of. You can tap on each one individually, or swipe to select several at once.
Step 3: Once you’ve picked the photos you want gone, look for the trash can icon and tap on it.
Step 4: Your iPhone will ask you to confirm that you want to delete the selected photos. Just tap “Delete” to confirm.
So, the steps are as easy as turning off the silent mode. Now, here’s something important to know:
When you delete photos, they don’t disappear right away. Instead, they’re moved to a folder called “Recently Deleted.” They hang out there for about 30 days before they’re completely gone for good.
If you need to free up space right away, here’s what you can do:
Step 1: Open the “Recently Deleted” folder.
Step 2: Tap “Select” in the top right corner. Then, tap “Delete All.”
That’s it. Now all those photos are gone for good, and you’ve got some extra space on your iPhone.

Source: Apple Support
If you are removing the photos to get some storage space in your phone then make sure to back it up somewhere. You can do it on your computer for instance. Connect your iPhone SE to the computer using a USB Cord. Using Image Capture or Preview on Your Mac, import photos to your phone.
How to Save Photos After Deleting Them?
Photos are automatically saved in cloud storages like Google Photos, Dropbox, and OneDrive. So make sure to have them installed and you won’t have to worry about losing any images after deleting them.

Source: Google
After you install these apps, make sure to configure them to automatically save the photos. In this way, even if you delete all the photos from the iPhone, you can still access the photos in the cloud storage.
Tips on Deleting Multiple Photos from an iPhone
Now, when you try to delete multiple photos from an iPhone there are a few tips you need to remember. Let’s go through each of them
Delete in Batches: Instead of trying to delete all your photos at once, it’s better to delete them in smaller groups. It’s recommended to delete no more than 20 photos at a time. This makes the process smoother.
Use Siri: If you have Siri on your iPhone, you can use voice commands to quickly delete multiple photos. Just activate Siri and say something like “Delete [number] photos.” Siri will then ask for confirmation, and the photos will be removed from your phone.
Turn on iCloud Photos: If you use iCloud, turn on the “Optimize iPhone Storage” option. This helps save space on your device by storing only optimized versions of your photos. Full-resolution images are stored in iCloud, and you can download them whenever you need to.
Remember Recently Deleted: When you delete photos from your iPhone, they don’t disappear immediately. They’re moved to the “Recently Deleted” album and stay there for 30 days before being permanently deleted. Don’t forget to check this album if you want to permanently remove photos. You can also restore photos from this album if you accidentally delete them.
Bonus: Find out why the iPhone home button is not working.
Frequently Asked Questions (FAQs):
What is the Fastest Way to Delete Photos from iPhone SE?
The fastest way to delete photos from iPhone SE is to open the Photos app and navigate all the way to the ‘All Photos’ section. After that, tap on the top right and you will find the ‘trash’ icon. Click on it and the images will be sent to trash. After that, go to ‘Albums’ and then check the recently deleted images, tap on them and delete all.
Why is My iPhone SE not Deleting Photos?
Your iPhone SE is not deleting photos because your phone might be synced in with iTunes. If the photos are synced with iTunes then you need to get the photos removed from iTunes first. Then delete it from your iPhone SE.
Where do Deleted Photos Go on iPhone SE?
When you delete photos on iPhone SE, they go to the ‘Recently Deleted’ album for 30 days. All of the photos in the album get deleted permanently after 30 days. However, if you delete your photos using iCloud devices in one device then the photos in the other devices also get deleted.
Conclusion
In conclusion, the simple guide to delete photos from iPhone SE involves going to the album and pressing the delete icon. It’s quite easy. But keep in mind that before you try to delete the photos permanently, have a proper check and verify whether you want to keep them or not.


